DVDSmith Movie Backup Alternatives and Similar Softwares

DVDSmith Movie Backup is a totally free DVD copier and DVD backup software which can decrypt and remove all kinds of DVD protections, copy DVD to computer hard drive as DVD folder. You can flexibly copy entire DVD disc or copy main movie only. But from some forums, we found many people have issues using DVDSmith Movie Backup. So any program to replace DVDSmith Movie Backup? More excellent, more professional? Yes, just follow the top 2 alternatives to DVDSmith Movie Backup.

Best alternative to DVDSmith Movie Backup is Pavtube ByteCopy Software. We have to say it is the best DVD copier/ripper in the world. What's more, it is also an excellent Blu-ray copier, ripper.

Top 1. DVDSmith Movie Backup Alternative

Powerful Features of Pavtube ByteCopy

Support to decrypt all the latest copy protection Pavtube ByteCopy has the ability to bypass copy and region protection on a commercial DVD dis. In addition, as the Blu-ray disc encryption frequently changes and becomes harder to crack, Pavtube ByteCopy will continuously upgrade to support to circumvent all the latest copy protection on Blu-ray/DVD including AACS, BD+, CSS, region code, RCE, Sony ArccOS, UOPs, Disney x-project DRM, etc.
Two Copy Ways ByteCopy can 1:1 backup DVD without quality loss. With the “Full Disc Copy” function in the top menu bar, you can preserve the DVD and Blu-ray’s original file structure, backup Blu-ray and DVD disc to Mac with one click. Using “Directly Copy” feature, you can backup Blu-ray main movie or “Directly Copy 3D Blu-ray Disc” content in original M2TS/VOB format with original video quality.
Lossless/uncompressed MKV option and multiple soft audio tracks & subtitles. ByteCopy offers a lossless MKV option in output list, which means you’ll get a real uncompressed MKV file keeping DTS 5.1/7.1 surround audio without any quality loss on big screen. It also offers multi-track MP4/MOV/AVI presets with multiple audio streams and removable subtitles, so you can free switch, turn on/off during playback.
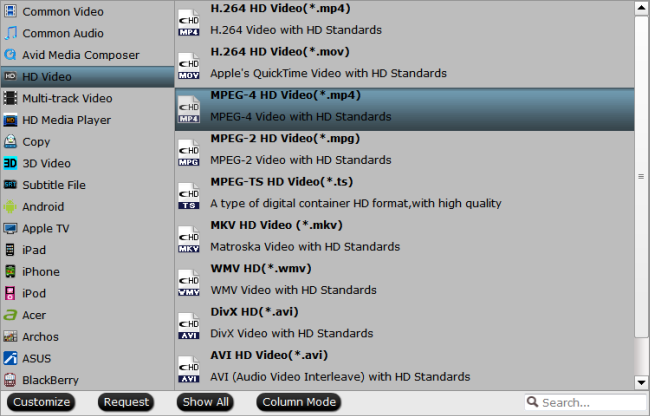
Various output presets. Pavtube ByteCopy supports converting DVD to virtually any popular video and audio format so that you can freely watch movies on Apple iOS devices, Android OS devices, HDTV, 3D TVs, PSP, PS4, PS3, Plex, WDTV Live, Roku 4 and more devices. In recent update, ByteCopy can support ripping Blu-ray/DVD movie to H.265/HEVC MP4 with better video quality compared to H.264 MP4 in same profile presets. It even can create 3D SBS video from 2D/3D Blu-ray and DVD on Mac for your VR Headsets such as ZEISS VR One, Oculus Rift CV1, ANTVR Kit, Samsung Gear VR, etc.
Stable in Latest Mac Operating System ByteCopy supports the latest Compatible with Windows 10, Windows 8.1, Windows 8, Windows 7, Windows XP. Mac version supports Mac OS X including MacOS 10.12 macOS Sierra, Mac OS X 10.11.4 El Capitan, Mac OS X 10.10 Yosemite, 10.9 Mavericks, 10.8 Mountain Lion, 10.7 Lion, 10.6 Snow Leopard, 10.5 Leopard.


How to Use Pavtube ByteCopy to Copy DVD/Rip DVD?

Download Windows version or Mac version


Step 1. Load DVD movie

Click “File” in top left corner and follow “Load from disc” to load the DVD movie to DVD Ripper on Windows or Mac.

Step 2. Two ways to copy DVD movie

A. DVD full disc copy

Full disc copy allows you to keep the whole file structure in your DVD disc complete without any quality loss. Click the “Copy the entire disc” button to start DVD full disc copy.

B. Directly copy

If you hate the extras in the DVD, you can try copying DVD main movie only which will leave out any extras for you. Click the format bar to follow “Copy” > “Directly Copy.”

Step 3. Rip DVD to multi-track MKV/MP4/MOV/AVI

Pavtube ByteCopy also allows you to preserve multi-track information when you choose DVD to multi-track MKV/MP4/AVI/MOV. Click the format bar to pick the proper multi-track output format under “Multi-track Video” option.

Step 4: Start backup and copy DVD

If you choose the second or third way to copy DVD movie, you need to hit the “Convert” button in bottom right corner to start DVD main movie copy or DVD to multi-track MKV, MP4, MOV and AVI conversion. When the process is completed, open output folder and find the ripped DVD file. 

Finally, you can enjoy your DVD movies on computer as you like without hassle. 

Top 2. DVDSmith Movie Backup Alternative

Free DVDAid offers every user the opportunity to rip, encode and edit DVD to almost any video and audio format freely. Without extra payment, you could own a freeware to assist with DVD to video/audio transition which enables you to watch DVDs on other multimedia players without limitation. Plus, with the built-in video editor, Free DVDAid is considered to be a easily handled video editing tool with the ability of trimming, cropping, splitting, merging, adding subtitle file, etc.

  • A 100% Free and Easy way to rip your DVD Movies for Personal Use
  • Support DVD disc, DVD VIDEO_TS folder, and DVD IFO/ISO
  • Rip DVD to AVI, MKV, MOV, M4A, AAC… around 70 video and audio formats
  • Fast conversion speed with the NVIDIA CUDA technology and AMD ® Accelerated Parallel Processing (APP)
  • Customize DVD content with built-in video editor

You can go to learn how to use Free DVDAid software.

Source: techmovieshare.blogspot.com

Related Articles:

Format Factory Alternative | Camtasia Studio Alternative | Handbrake Alternative | MakeMKV Alternative | Super Converter Alternative

MPEG StreamClip Alternative | Superior iMovie Alternative | QuickTime Alternative | iDVD Alternative | Wondershare Alternative |RipIt Alternative

Best MediaCoder Nvidia H.265 Encoder Alternatives | Adobe Flash PlayerAlternative | Freemake Video Converter for mac Alternative | Flip4Mac Alternative

DVD Rippers Review | Pavtube ByteCopy Review | Video Converters for PC Review | H.265/HEVC video decoder Review | 4K Blu-ray Ripper Review

Best VR Movies Review | DJI Phantom 4 Pro+ Review | DJI Mavic Pro Review | Instagram Video Converter Review | Microsoft Surface Review

4K Video Editor Review | Pavtube iMedia Converter Review | Blu-ray to QuickTime Review | Customer Review for Pavtube Media Magician


Convert YouTube video to SWF on Windows

As we know, YouTube is a nice place to discover, watch, upload and share videos and many video fans love to download YouTube video for entertainment. And SWF is an Adobe Flash file format which is widely used for streaming flash videos online due to its small file size. For certain usage, you will need to download YouTube and convert YouTube to SWF. Now it is completely possible with the help of YouTube to SWF Converter. This article guides how to download and convert YouTube video to SWF on Windows or on Windows/Mac with the powerful YouTube to SWF Converter.

This best YouTube to SWF converter is called Pavtube Video Converter Ultimate (Mac). It can convert any YouTube videos to SWF format on Windows(10, 8.1, 8, 7, XP, etc), or on Mac OS X 10.11 El Capitan, Mac OS X 10.10 Yosemite, 10.9 Mavericks, 10.8 Mountain Lion, 10.7 Lion, 10.6 Snow Leopard, 10.5 Leopard. Besides, it also supports convering various video to any format you want, for example, MP4 to SWFDVD to MP4H.265 to AVI, ISO to MP4, etc.

Free download the best YouTube video converter for Windows: 


Other Download:


- Pavtube old official address: http://www.pavtube.cn/blu-ray-video-converter-ultimate/ 
- Cnet Download: http://download.cnet.com/Pavtube-Video-Converter-Ultimate/3000-2194_4-75938564.html 
- Soft32 Download: http://pavtube-video-converter-ultimate.soft32.com/ 
- Top4download: http://www.top4download.com/pavtube-video-converter-ultimate/qxxwevxs.html 
- Softpedia Download:http://www.softpedia.com/get/Multimedia/Video/Encoders-Converter-DIVX-Related/Pavtube-Video-Converter-Ultimate.shtml 
- OKD Download: http://owlkingdownload.com/index.php?a=prog&os=Mac&cat=Audio-Video&subcat=Video&det=475 
- Windows7download:http://www.windows7download.com/win7-pavtube-video-converter-ultimate/talndtbf.html 
- Softonic Download:https://pavtube-video-converter-ultimate.en.softonic.com/ 
- 2software.net Download:http://2software.net/download-pavtube-video-converter-ultimate-free-download-and-software-reviews-4051 
- Gigapurbalingga Download: http://gigapurbalingga.com/pavtube-video-converter-ultimate-full/ 
- FullprogramDownload: https://www.fullprogramlarindir.com/pavtube-video-converter-ultimate-full-tam-indir.html 
- Daffasoft Download: http://daffasoft.com/1716/pavtube-video-converter-ultimate-4-8-4-full-crack 
- Eradownload: http://eradownload.com/pavtube-video-converter-ultimate-4-8-6-6-crack-free-download/ 
- Eurodownload: http://www.eurodownload.com/download-software/223704/Pavtube-Video-Converter-Ultimate.html

Step 1. Run the best YouTube Video to SWF Converter, drag and drop source video to the program.


Step 2. At the bottom part of the converter, there is a row of output formats divided into several sections. You can find SWF format under the “Flash Video”.


Tips:

A. For some advances users, you can go to adjust video and audio parameters like bitrate, resolution, channels, etc. Click “Settings” button you can go to check and change them as you like.

B. The YouTube Video Converter additionally offers editing functions for you to enhance your video files. For example, you can trim or crop your videos to get the very parts of your video, you can also add watermarks in text or image, subtitles to your video, and so on.

Step 3. Press on “Start Conversion” to start encoding YouTube videos to SWF video. When conversion completes, press on “Open” to locate converted videos and add them for your usages freely.
Read More:

Blu-ray movies on QuickTime on Mac OS X El Capitan

What is the first media player on Mac OS X El Capitan? Quicktime will be the one. Not because it is bundled with Mac OS X, just in that it's powerful media technology that works on Mac OS X El Capitan with just about every popular video or audio format you come across. Its playable audio and video formats just like the same sheet:


Although QuickTime supports many video formats, as we all seen, Blu-ray is not in the list. So if you have many Blu-ray movies, no matter from your paid Blu-ray discs or downloaded from internet, how do you watch Blu-ray movies on QuickTime Mac OS X El Capitan?

Pavtube BDMagic for Mac is exactly designed for this problem. This Blu-ray to QuickTime converter enables you to rip and backup Blu-ray to QuickTime playable formats at ultra fast time with high video quality. What’s more, it is updated to support the Mac OS X El Capitan and Yosemite 10.10. So you can rip Blu-ray on your Mac OS X El Capitanand Mac Yosemite 10.10/10.9. It also can play Blu-ray movies of region A, region B and region C.


Free download and install:


Other Download:
- Pavtube old official address: http://www.pavtube.cn/blu-ray-ripper-mac/
- Cnet Download: http://download.cnet.com/Pavtube-BDMagic/3000-7970_4-76177782.html

How to rip Blu-ray to QuickTime playable format?

Step 1: Load Blu-ray movies

Click the "Folder" icon on the top menu bar to load your Blu-ray disc to the program


Step 2: Choose QuickTime MOV format

Click "Format" bar, from its drop-down selection, define "MOV-QuickTime (*.mov)" as the output profile format.


Step 3: Start to rip Blu-ray to QuickTime

Start to rip Blu-ray to QuickTime format process on OS X El Capitan by hitting the right-bottom conversion button. When the conversion is done, locate the ripped Blu-ray in the output folder.

Now, you can freely enjoy your Blu-ray movies on QuickTime on Mac OS X El Capitan.
In addition, this Blu-ray Ripper actually can convert Blu-ray, ISO to H.265, M3U8, MP4, etc, for iPhoneiPad, Apple TV directly. Besides, it also has powerful function to extract FLAC audio

Source: http://2d-3d-movie-tips.blogspot.com/2015/07/watch-blu-ray-on-quicktime.html

3D MKV movies to Rift CV1 on macOS Sierra/El Capitan

If you are the lucky ones who have tried these Rift CV1 on macOS Sierra/El Capitan, both in versions for the Rift CV1 to the recent macOS Sierra/El Capitan as well as 3D MKV movies to Rift CV1, sure you’ve fallen in love with the virtual reality with its endless possibilities. They open when live experiences, enjoy the games from completely new perspectives and, of course, when it comes to watching 3D MKV movies in the famous film that comes standard with the glasses. On the other hand, just like other devices, Rift CV1 users are also likely to experience various technical problems, especially when playing 3D MKV videos 3D effects. One of the common problems you might often experience is "Audio missed" or "Unsupported errors". If you don't have any idea of how to fix these problems, just read on for details. 

A very common problem macOS Sierra/El Capitan users ave is playing 3D MKV movies. When you Mac tried to open 3D MKV files on Mac to Rift CV1, you'll commonly receive an error message along the lines of this is not a movie file. Actually, Rift CV1 doesn't support the MKV or HD MKV files natively. This gets really annoying if you come across a 3D MKV file and want to watch it on your Mac. Fortunately, there are a lot of options to help you play an 3D MKV file in the macOS Sierra/El Capitan. 

In fact, 3D MKV files in 3D SBS(Side-by-Side) work on Rift CV1, but the audio has to be encoded in AAC or MP3 for stereo. AC3 and DTS were removed because of high licensing costs. You can either wait till a developer brings a Rift CV1 VR player which supports also custom codecs or you can convert your video files to ACC audio or root your phone and add codecs for AC3/DTS. However, the easy and effective solution is to re-encode your 3D MKV files to Rift CV1 more compatible format to get them play nicely.  Pavtube ByteCopy for Mac  is the bee's knees, which can help you easily solve the 3D MKV 
and Rift CV1 no sound problem. 

Overall, the program is a professional 3D MKV Video Converter, which comparatively has better output quality, in particular HD videos and intuitive interface. With it, you can fast convert MKV to Rift CV1 supported file type like MP4, MKV in .mp3, .aac audio. Best of all, this software allows you to convert 3D MKV to 3D videos such as MKV Top-bottom 3D Video, MP4 Top-bottom 3D Video, MP4 Side-by-Side 3D video (See The Differences Between SBS 3D, Anaglyph 3D and Top/Bottom 3D ) , which can be played on Rift CV1 perfectly. If you are Windows users, please turn to  
Pavtube ByteCopy  for Windows. Now, we will give a detailed guide on the whole process from converting 3D MKV to Rift CV1 supported video. 

The Best 3D MKV Movies converter Tool: 


Other Download:
- Pavtube old official address: http://www.pavtube.cn/bytecopy/
- Cnet Download: http://download.cnet.com/Pavtube-ByteCopy/3000-7970_4-76158512.html

How to convert MKV to Rift CV1 supported format without quality loss 

Step 1. Load movies files to the software 


You can either click "Add" button to import MKV files you want to upload to YoubTube. Also you can directly drag and drop the files into this program. 

ISO to MKV Ripper

Step 2. Select the 3D MKV as output format 

Click "Profile" and find "3D Video". there are a lot of format options for you. Here you can recommended to select MP4-3D or MKV-3D as the output format. 

SBS 3D MKV video

Step 3. Specify video/audio parameters 

Click Settings button to adjust video/audio parameters like video resolution, bitrate, audio codec, audio channel. According to my experience, anything over 720p does nothing but turn battery energy into heat, due to the screen resolution. 

3D SBS MKV settings

Step 4. Start encoding 3D MKV to Rift CV1 

Click Convert button to start converting 3D movies MKV to Rift CV1 friendly video. After the conversion, you can get the resulted videos by clicking the Open button.


Tips: Add 
3D MKV movies on Rift CV1 watching

To watch your 3D MKV movies on Rift CV1, however, there is an additional step, and it's not entirely straightforward.

The following will allow for perfect 3D playback of videos set up in a SBS format. SBS format means the left and right video channels are contained within the same file and appears as a near-mirror image when played back using a standard media player. To view your SBS 3D video files on your 
Rift CV1, follow these steps:

1. On your MicroSD card file directory, navigate to Oculus > Movies > Your Movies
2. Create a new folder within "Your Movies" and label it "3D"
3. Import or move your SBS 
3D MKV movies into your newly created "3D" folder

Once you have created your 
3D MKV movies and imported compatible video files, insert your MicroSD card into your phone (if it isn't already), slide the phone in your Rift CV1, and put the virtual reality headset on your head. Then:

1. Navigate to 
Rift CV1 from the main menu
2. Navigate to "My Videos" from the 
Rift CV1 content library menu
3. Select the 3D video you wish to view (if you followed the above steps it should have a "3D" label in the upper righthand corner)
4. Choose the cinema mode to begin playback

Related Article and Tips: 

Remove Disney X-project DRM DVD on Windows 10/Yosemite
How to Get all DVDs into Synology NAS drive for Streaming
How to Backup Disney Copy-Protected DVD Discs for watching
Watch 3D Movies on Mobile Device using a VR Theater application
Watch YouTube 3D Videos on Sony BRAVIA HD TV
Ripping TV series DVDs to PC
Copy 2016 hot Blu-rays to NAS for HD 4K TV or Normal def TV streaming
Enjoy free and smooth Blu-ray playback on Galaxy S7/S7 Edge
Can I Store iTunes Movies to An External Drive to play in LCD TV?
Top 3 3D Video Converters for Mac El Capitan 10.11.1/10.11.2
2016 Best 3 DVD Ripping Software
Backup and Put Blu-rays to Synology DS416slim NAS on Mac
How to Get AVCHD MTS Workflow with DaVinci Resolve (Lite)?
Best Software for ripping Blu-ray Audio to FLAC on Mac OS X
2D 3D Movie Tips: The best way to convert all 2D videos to 3D SBS MP4.
Copy Blu-ray to DESTEK Vone 3D VR Headset 


Source:http://2d-3d-movie-tips.blogspot.com/2016/08/3d-mkv-movies-to-rift-cv1-macos-sierra.html

Rip and copy DVD to VLC on Mac OS X

How to rip and copy DVD to VLC on Mac OS X is an everlasting and hot issue in all relevant digital copy, video conversion forums and bulletins. Backing up DVD to VLC means that you can enjoy your favorite DVD videos on computer conveniently and can protect your physical DVD disc from scratching. That’s why many people choose to transfer DVD to VLC on Mac OS X. Here, this article will show you two methods to play DVD on VLC: Method one, rip DVD with VLC on Mac OS X; Method two, copy DVD to VLC with VLC Alternative on Mac OS X.

Method one: How to rip DVD with VLC Media Player on Mac OS X El Capitan?

VLC is not just a media player. It allows you to rip your DVD as well. Here we will show you how to rip DVD movies with VLC. (Note : This tutorial is written for VLC 0.9.6 and up).
Step 1: Start up VLC on Mac and load up DVD video. Under “Media”, click on “Convert/Save”
Step 2: When Open Media window appears, click DVD tab and browse the Disc device to make sure the field is pointing to the optical drive. Then navigate to “Convert/Save’

Step 3: Next the Convert screen opens where you can select a location for the ripped file.


Step 4: Give the file a name and a supported extension. For this example we ripped Lord of the Rings and gave it a MOV extension. If you don’t label it with a supported file extension it will default to .ps (Program Stream) file.

Step 5: When all settings are done, the Convert screen will look something like this where we have the source drive and destination file with appropriate extension.

Finally, You should be able to play the converted file with other media players assuming you have the right codec.

Using VLC to rip DVD on Mac OS X takes too much time. And you will notice the converted movie in lower quality compared to the original. Also, VLC does not support the DVD with internal encryption so that it can’t recognize protected DVD well and fail to extract movies from DVD successfully. In this case, you have to turn your eyes to VLC Alternative to solve the problem.

Method two: How to copy DVD to VLC with VLC Alternative on Mac OS X El Capitan?

Pavtube DVDAid for Mac is recommended as VLC Altenative, which can 1:1 backup DVD protected without lossless quality. It enables you to rip DVD to VLC on Mac OS X El Capitan in H.265, M3U8,VOB, MP4, MKV, MOV, AVI, DivX, etc, at fast speed. Not like VLC, it continuously upgrades with new decryption technology for new released DVD. And it can support the newest Mac OS X system, like El Capitan, Yosemite 10.10/10.9.

Free Download and Install DVD Ripper for Mac OS X El Capitan


How to rip DVD to VOB for VLC on Mac OS X El Capitan


Step 1. Import DVD to the app

Run Pavtube DVDAid on your Mac, and load your DVD disc by clicking the “File” icon and this process only takes you a few seconds.

Step 2. Copy DVD main movie

Click the format bar to follow “Copy” and “Directly copy”. Directly copy allows you to copy the main movie from your DVD disc without extras. If you want your converted DVD supported by more devices, take a try with other popular video formats suitable for your device. Please kindly note that Pavtube trial version only supports 6-time directly copy.
dvdaid for mac vob format

Step 3.Start DVD to VOB conversion

Click the red button “Convert” on the main interface to start conversion from DVD to VLC on Mac OS X El Capitan. It will pop up a conversion window indicating the conversion progress from DVD to VOB.
Both of the two method can achieve the process of DVD to VLC on Mac OS X El Capitan. Nevertheless, the latter method obviously is easier than the former one. and it has much faster DVD ripping speed than DVD ripping with VLC. What’s the most important, ripping DVD to VLC on Mac OS X El Capitan with VLC Alternative can reserve the original video quality. Now, you can smoothly enjoy DVD on VLC.
In addition: With Pavtube ByteCopy for Mac, you can backup DVD to multi-track MKV for VLC on Mac OS X El Capitan with subtitles and audio tracks well preserved.

Source:http://2d-3d-movie-tips.blogspot.com/2015/10/rip-dvd-to-vlc-on-el-capitan.html

Tricks for Downsizing GoPro Hero 4K Video to 1080p

Summary: Are you troubled with how to downsize GoPro Hero 4K video to 1080p for playback and editing? Sometimes, 4K video can’t be played properly most likely your computer is not able to process the data of the large HD files fast enough. Check out the tips below.


Hot search: GoPro Hero 4K video to DropBox | GoPro Hero 4K video to Sony Movie Studio | GoPro Hero 4K video to Vimeo | GoPro Hero 4K video to VLC | GoPro Hero 4K video to Pinnacle Studio 

We know that GoPro Hero cameras can capture professional-quality videos, for example Hero3 White can capture 1080p 30fps video, Hero3+ Silver can capture gorgeous 1080p 60fps video, Hero4 can take time lapse videos with high data rates, Hero4 Black can shoot incredible high-resolution 4K 30fps and 2.7K 60fps video and the high frame rate 1080p 120fps video. 

What is the difference between 1080p and 4K resolution? 
A High Definition TV with 1080p resolution is composed of two million pixels (1920*1080), while a 4K TV (aka Ultra High Definition) has over eight million pixels (3840*2160). Therefore, 4K has around four times more resolution than 1080p and produces a clearer picture. 

As we know, the majority of playback, editing work is still being finished in 1080p. In most cases, we still need to downscale most of the 4K video files to 1080p. In fact, you may not see any real differences if you're not doing much to the footage. One of the huge benefits to 4K, that you can do a lot to the image and retain detail for a beautiful 1080p finish. For those who wanna play and edit GoPro Hero 4K videos on old computer (playing a 4K video requires more computing power and it could be more time consuming), we suggest you to convert all GoPro Hero 4K videos to 1080p then play in 1080p and smart-render. 

Best solutions to downscale GoPro Hero 4K video to 1080p: 
Although there are numbered tools and utilities can convert and compress the ultra HD videos, few of them can process at a fast speed. Well, Pavtube Video Converter for Mac is considered to be the best 4K to 1080p converter. It is surely in the support of compressing GoPro Hero 4K videos to 1080p faultlessly. For Windows users, Pavtube Video Converter is the alternative choice. 


Other Download: 

- Pavtube old official address: http://www.pavtube.com/video_converter/ 
- Cnet Download: http://download.cnet.com/Pavtube-Video-Converter/3000-2194_4-75734821.html 
- Softonic Download: http://pavtube-video-converter.en.softonic.com/ 
- Soft32 Download: http://pavtube-video-converter.soft32.com/ 
- Top4download: http://www.top4download.com/pavtube-video-converter/oglsvigp.html 
- Softpedia Download:http://www.softpedia.com/get/Multimedia/Video/Encoders-Converter-DIVX-Related/Pavtube-Video-Converter.shtml 
- Instaluj Download: http://www.instaluj.cz/pavtube-video-converter 
- Windows7download:http://www.windows7download.com/win7-pavtube-video-converter/ymuimxah.html 
- Softonic Download:https://pavtube-video-converter.en.softonic.com/ 
- FullprogramDownload: https://www.fullprogramlarindir.com/pavtube-video-converter-full-4-6-0-5344-indir.html 
- Eurodownload: http://www.eurodownload.com/download-software/169809/1A-Pavtube-Video-Converter.html

How to downsize GoPro Hero 4K video to 1080p? 

Step 1: Download and have a quick installation. The trial version will have a watermark on your converted files. Except for that, there are no time limitation, no virus, and no unnecessary bundle apps while downloading. After that, click “Add Video” button to load your GoPro Hero 4K videos. You can load several files at once thanks to “Add from folder” button. 


Step 2: Click the “Format” drop down list to select output format. If you want to play GoPro Hero 4K videos on decent media player, you’d better set a preset profile that best meets your needs. For instance, if you want to play GoPro Hero 4K videos on VLC smoothly, “HD Video>>H.264 HD Video (*.mp4)” would be the best choice. 


Step 3: Click “Settings” button; you can adjust video and audio settings, including codec, aspect ratio, bit rate, frame rate, sample rate, and audio channel. To down-convert ultra HD 4K to 1080p, do remember adjusting video size to 1920*1080. That is the exact 1080p. 

Step 4: At the end, hit “Convert” button to let the 4K to 1080p conversion begin. 

Conclusion: When the conversion finished, check the generated 1080p video, you will certainly be satisfied with its final video quality. It would be easier for you to playback and edit. 
Read More Tips About DJI
Source: http://pc-mac-compatibility-issues.blogspot.com/2015/07/downsize-4k-video-to-1080p.html 

Convert Panasonic 50i Video to 25P

Summary: In this guide, you can get to know the easy method to convert Panasonic records in 50i format to 25p for upload to YouTube. 

I am primarily a musician and audio engineer, the video editing side of things is mostly just a hobby and for fun. I have a Panasonic camera borrowed from one of my friends. I think it records in 50i (50 interlaced fields) format in full HD, which has to be converted to progressive (25p). As we are doing music videos of our band, now we will probably just put the videos up onto youtube to promote our CD. I use hitfilm 2 ultimate to edit primarily. The goal of editing is just to make something interesting to render. As Panasonic videos isn’t well supppoted by compatible format by many editers, I think only by converting can I avoid video playback, editing and importing problems.I previously used a freeware program but I recently discovered it had adware or spyware so I needed something better. 

Then it was told to me on the hitfilm forums by one of the main staff of hitfilm. And viewing the posts of someone on a forum who’s opinion I highly value, I was highly recommend to use a decent Panasonic Video Converter – Pavtube Video Converter, to help me get it done.I like the ability to convert to most formats – especially from camcorder/camera formats and to the editing codecs like avid’s ones. Plus the price of pavtube is very good and fair. 

Surprising, we find the program is 20% off at Pavtube Christmas Best Seller. 

Convert Panasonic 50i videos to 25p for editing and sharing on Youtube 

1. Install Panasonic Video Converter. Run it and transfer Panasonic video to hard drive, and then click “Add Video” or “Add from folder” to add the Panasonic video clips you need into the program. 

2. Select output format for video editing software. 

Click “Format” menu you will find various video formats listed by different devices. Just choose a compatible video format for your editing software. Choosing the editing software option directly will help you to take less time to find a more preferable video format. 

For sharing on website like Youtube, you can choose MP4 format for output. 


3: Click settings button to adjust the output video’s parameters, such as bitrate, resolution, etc. 

For instance, if you want to convert Panasonic records in 50i format to 25p, set Frame Rate to 25. 


4. Click “Edit” button and you are allowed to trim, crop, add text/image/video watermark or some effect to your output video for making it perfect. 

For example, 

a. You can switch to “Crop” tab. Choose Advanced mode, lock the “Keep Ratio” and you can free change aspect ratio. 

b. You can deinterlace your 50i video to 50p by check the “Deinterlacing” option from “Effect” tab. 


c. The function of adding subtitles to output files will contribute to make your own videos. 

You can use free software Subtitle Edit to edit your subtitle content then add it to output videos 

5. Start converting Panasonic video. 

This Video Converter for Panasonic will convert Panasonic recorded videos at top speed, you can choose rich formats for output, and now I can easily and successfully use Panasonic recorded footages to edit on Windows PC (Windows 8.1/8/7 included), and then upload on Youtube for sharing with your friends and family. It really do a great favor for me, if you have the same problems, you can take a try now! Good luck! 

Tips: 

Need to convert more various formats, or convert DVD and blu-ray movies for backup or further playback? Pavtube iMedia Converter for Mac can help you to accomplish both of them. It is integrated software for converting different videos, DVDs and blu-ray discs. Good news to you that you can get 20% discount at Pavtube Christmas Giveaway. Go to get it now. 

Find more related guides in Pavtube Panasonic Column: 

Source: http://digitalmediasolution.altervista.org/blog/convert-panasonic-50i-video-to-25p/