Showing posts with label Surface Pro. Show all posts

How to Move X-Men: Days of Future Past iTunes movie to Surface Pro

Free download iTunes DRM to Surface Converter and follow the guide to convert X-Men: Days of Future Past iTunes video for syncing to Surface Pro.

X-Men: Days of Future Past, the seventh film of the X-Men series, takes a place in the 2014 best-reviewed superhero fimls and science fiction movies list. Since being theatrically released in May, it has earned over $700 million across the world. And its sequel will come out in May 2016. Many X-Men or movie fans wonder if they have downloaded X-Men: Days of Future Past from iTunes store, how to watch it freely on Surface Pro?
convert X-Men: Days of Future Past iTunes to Surface Pro

How to Put X-Men: Days of Future Past iTunes Movie on Surface Pro

As know to all, iTunes video is M4V format that was protected by Apple FairPlay so that purchased iTunes Movies and TV shows can only play on Apple devices. Not only that, when you download a movie or TV show, a list of things wait for figuring out such as authorize, sync. However, not all these apple devices can sync successful. Sometimes, it also easily appears error. iTunes make user have to purchased their own devices.

But other non-apple devices like Surface Pro really don't play iTunes movies or TV shows? The answer is negative, in fact we can obtain media sources in some other way. If there is an iTunes Media Converter software at hand, all problems could be readily solved. The reason is that iTunes video is DRM protected and in M4V format. Therefore, removing DRM protection and resetting the file format could enable Surface Pro to get media files from iTunes library successfully.

Here Pavtube iTunes to Surface Pro Converter is highly recommended for its easy-to-use interface, straight workflow and reliable video quality. (Read the review) It can remove the DRM protection from iTunes downloaded video, and transfer it to various video formats including MP4 profiles for Surface Pro. What's more, this DRM Removal Tool can also strip DRM protection from Amazon Instant WMV videos, and Digital copies, convert them to Surface Pro for playback.

Download a trial  and you're ready to remove DRM from  X-Men: Days of Future Past iTunes movie with professional iTunes to Surface Pro Converter Tool.

Some tips on before using ChewTune:

1. Make sure that your computer is authorized for source videos, that is to say you can play the source iTunes movies in iTunes.

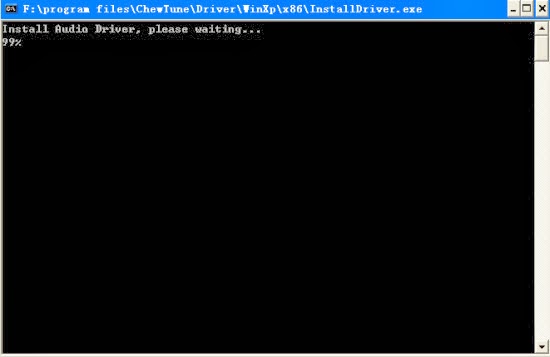
2. Allow the audio driver installed during the Pavtube ChewTune installation.

3. Close iTunes before running the Pavtube DRM Removal Converter when converting iTunes M4V movies.

4. It would take as long as the source movie length for the whole DRM video to Surface Pro conversion process since Pavtube ChewTune records source DRM videos in 1:1 video and audio quality.

How to Convert  X-Men: Days of Future Past DRMed iTunes to Surface Pro DRM-free MP4 videos

Step 1. Run iTunes DRM to Surface Pro Converter, click "Add Video" or "Add from folder" button on the main interface to import iTunes movies, or you may drag and drop the  X-Men: Days of Future Past movie from iTunes Movie Library to the software.

iTunes to Surface Pro Converter

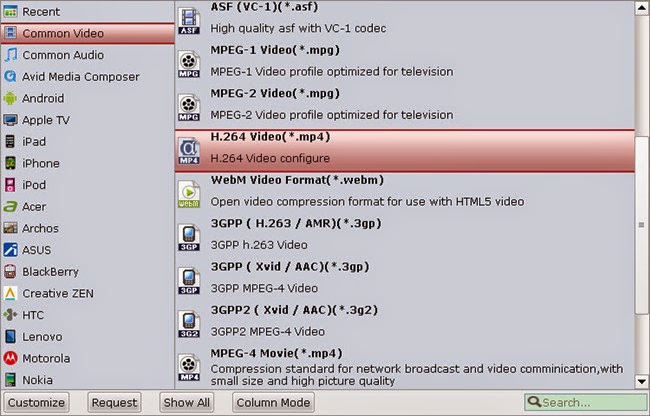
Step 2. Choose the best codec for Surface Pro.

Click "Format" and select an output format for playing on Surface Pro. Here I suggest you choose "Windows > Microsoft Surface Windows RT/Pro H.264 Video (*.mp4)", because H.264 .mp4 play well on Surface tablets.

Surface Pro video format

In order to achieve the best video and audio playback on your Surface Pro, you might need to customize profile settings. Enter “Settings” menu, adjust profile parameters including video codec, video size, bitrate, and frame rate, and save it.

Step 3. Click "Convert" to get X-Men: Days of Future Past DRM-free iTunes movie. The conversion proceeds as iTunes plays the movie. So DO NOT turn off iTunes until the conversion is completed.

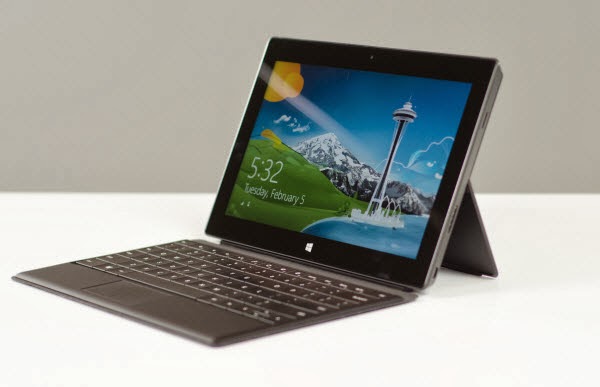
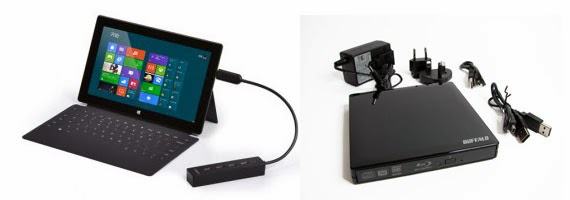
Now, you can sync DRM-free iTunes movie to Surface Pro for watching freely. What's more, you can also put iTunes movie to Surface RT, Surface Pro 2 and Surface Pro 3

How To: Run Battery Report on Surface Tablets

Surface RT and Surface 2 use an internal lithium-ion battery designed to go everywhere you go. The amount of time your battery lasts varies depending on the kinds of things you do with your Surface. Here gives the way to run Battery Report on Surface Tablets. 

Have you wondered how your Surface tablet’s battery is doing? Has it seemed to be going dead more rapidly lately but, you don’t know for sure?


Well, if you’re having problems or just curious, you can always run a battery report against your Surface tablet.

A battery report is very helpful for helping you figure out how your battery(s) is performing by showing you things like…
  • A 72 hour graphic usage history including charges and drains
  • How much power (in mWH) your battery(s) is holding
  • Capacity history (good for seeing if your battery is failing)
  • Estimates on how long the battery should last
As you might imagine, this can be quite helpful in determining if you are having a problem with your battery and may be requested of you if you contact Microsoft tech support with problems like:
  • Short battery life
  • Frequent reboots
  • Overheating issues
OK, now that you know what it’s good for, you can follow these steps to run a battery report on Surface RT/2 or Surface Pro/Pro2 tablets.

Run Battery Report on Surface Tablets:
  • Bring up the search charm
  • Search for cmd  
  • Chose Command Prompt from the search results
  • In the Command prompt window that came up on your desktop, type in “powercfg /batteryreport” and hit Enter
  • It will generate a report file and tell you where it is located. Usually it will be placed in the c:\users\ folder and it will be named battery-report.html

  • Browse to that location and open the report
I hope you found this procedure helpful.

Personally, since it only goes back 72 hours for most things, I recommend running a battery report every month or two and keeping them so you can compare trends over a long period of time. It could be very helpful if you are trying to determine if your battery is starting to fail at some point in the future.

Get "Stand Up and Cheer!" Blu-Ray Discs playable with Surface Pro on Windows 8.1/8

Do you have a new Microsofte Surface Pro? And do you have tried to play 1080p Blu-ray Movies like "Stand Up and Cheer!" on this Windows 8 Device? This article is mainly talking about how to rip Blu-rays to Surface Pro supported video format on Windows 8.1/8.  
Shirley Temple died of natural causes on February 10, 2014, at the age of 85. By the time she was six, Temple was under contract to Fox Films and her breakthrough came in 1934's "Stand Up and Cheer!" followed by "Little Miss Marker."

“I have a large Blu-ray collection and the one I like most is "Stand Up and Cheer!". I was wondering if I can enjoy "Stand Up and Cheer!" Blu-ray movies on my Surface Pro? Any way recommended on Windows 8.1/8?”

Blu-Ray Discs playable with Surface Pro

Surface Pro makes it clear that Microsoft knows what it's doing. The 10.6-inch, 1920 x 1080 panel on the Pro is gorgeous, maybe the best laptop screen I've ever seen. If you want to watch "Stand Up and Cheer!" Blu-ray movie on Surface Pro, you will need a tool to convert Blu-ray to Surface Pro supported video formats first.

There are many programs out there that allow you to make copies of your Blu-rays and let you watch them the way you want to view them. You may be confused about choosing a most suitable tool. If so, I recommend you try this Top Blu-ray Ripper from Pavtube Studio. It is easy to use for conversion and makes great quality copies of my Blu-ray disc.

If you are a Mac user, you can use its equivalent Mac version – Pavtube BDMagic for Mac for transferring Blu-ray to Surface Pro on Mac.

How to rip "Stand Up and Cheer!" Blu-ray movie to Surface Pro on Windows 8.1/8

FYI: Note: BD drive is required for ripping Blu-ray disc.

Step 1. Import Blu-ray disc/ISO/folder.

Click "Load files" to choose import from ROM, BD ISO/IFO or BD folder. It will detect and check the main title automatically; so keep it as default unless you want to include tidbits.

Blu-Ray Discs playable with Surface Pro
  
Step 2. Chose Surface Pro supported video format.

Click the drop-down list besides Format, you can find many presets for different devices, editing programs and media player.

Let’s choose " Windows " in left area and select "Microsoft Surface Windows RT/Pro H.264 Video (*.mp4)”  as target video format.

Blu-Ray Discs playable with Surface Pro 

Step 3. Customize video specs. (Optional)

Pavtube Blu-ray to Surface Pro Ripper also offers a editor window to let you free set eo specs; click "Settings" to customize output file size, bitrate, frame rate and sample rate.

Step 4. Start Conversion.

Click the "Convert" button to start converting "Stand Up and Cheer!" Blu-rays to MP4 so you can watch them in Surface Pro smoothly. Wait for moments, then click "Open output folder" to locate the converted file quickly.

Learn more: Transfer files (Videos, Pictures, Music) to Your Microsoft Surface

You may want to read:

Convert DVD ISO/IFO file to Microsoft Surface RT/Pro
Enjoy 1080p Blu-ray ISO movies on Microsoft Surface RT & Pro
Convert MKV to Surface 2 supported video format 
Rip and Convert DVDs to Surface 2, Surface Pro 2 
Rip Blu-ray to Surface RT for playback with multi-track MP4 
Transfer MKV, AVI, VOB, Tivo, WMV, MPG, MTS, FLV/F4V videos to Surface 2

Add VOB movies to Surface Pro for smooth playback

The easiest Windows/Mac solution to convert VOB videos to Surface Pro for freely playback with best quality & fast speed . 
Surface Pro comes with a 10.6-inch capacitive touch screen and it runs Windows 8 Pro, , but it also runs all of your legacy Windows applications. When we got the Surface Pro, we may be interested in putting the VOB movies stored on our computer onto the Surface Pro for watching on-the-go, but we all know that the this Windows 8 Tablet won’t play VOB videos. 


VOB standards for "Video Object". It is a video format to store video on a DVD disc. Surface Pro only support to playback videos in MPEG-4, H.264, H.263, MEPG-2, VC-1, WMV 9 format. So, if we need to playback VOB videos on the Surface Pro, we should first convert VOB to the Surface Pro supported video formats. Here we go! 

To accomplish this goal, you are highly suggested to try this Video to Surface Pro Converter, a professional tool to help you quick convert various video formats to Surface Pro's MP4 format with best video quality and simplest workflow. 


Note: If VOB files are still in your DVD discs, or in VIDEO_TS folder for Mac users, you need Pavtube Video Converter Ultimate and iMedia Converter for Mac for help. It’s a package tool that can help you convert BD, DVD and kinds of common video files. 

Tutorial: How to transfer DVD VOB Video files to Surface Pro for watching 

Step 1. Run this VOB to Surface Pro Converter; add videos. 

You can click the top left two icons to choose import individual videos or the entire folder. Drag-and-drop is also supported. 


Step 2. Choose Surface Pro MP4. 

Click the Format drop-down list, choose " Windows>Microsoft Surface Windows RT/Pro H.264 Video (*.mp4)” which works well for Surface Pro. 


Step 3. Customize video specs (Optional). 

Your can click "Settings" to free change video size, bitrate, frame rate and others. If you own a 16GB tablet and do not want to keep videos in large size, you can lower the bitrate settings to get video in proper size. 

Step 4. Start Conversion. 

Now hit the big red "Convert" to start converting VOB video to MP4 for Surface Pro. After conversion, you can click "Open output folder" to quick locate the converted video. 


Learn more related articles: 

Convert MKV to Surface 2 supported video format 
Rip and Convert DVDs to Surface 2, Surface Pro 2 
Rip Blu-ray to Surface RT for playback with multi-track MP4 
Transfer MKV, AVI, VOB, Tivo, WMV, MPG, MTS, FLV/F4V videos to Surface 2

Play iTunes M4V videos on Windows 8.1/8 RT/Pro Tablets & Phones

This article mainly discusses how to remove DRM protection from iTunes M4V videos and convert them to play on Windows 8.1/8 RT/Pro Tablets & Phones without limitation.

Windows 8.1/8 is already among us for some time. That says it all, and the opposite of everything on the new Microsoft operating system, how it can be a kind of Seven with the addition of the screen of the app. No, Windows 8.1/8 is much more. It ‘a new way of seeing the user and interact with the world around us.


You may have got a Windows tablet like Dell XPS 10, Asus VivoTab Smart ME400, Dell Latitude 10, Microsoft Surface RT/Pro, Toshiba Satellite U920T, Acer Iconia W700, Lenovo ThinkPad 2, HP Envy x2, Lenovo Yoga 11S... in hand, do you want to transfer your downloaded iTunes m4v videos to these Windows 8.1/8 RT/Pro Tablets & Phones?

“I tried copying a movie from my iTunes library to play it on my new Surface RT. I got the error message that it can’t play because of an unsupported format. It’s in m4V format.”

As is mentioned above, movies/videos downloaded from iTunes Store are mostly DRM (Digital Rights Management) protected, so that we cannot playback them anywhere else except authorized computer or idevices. Moreover, iTunes movie are in *.m4v which is not a Windows 8.1/8 friendly format.

So how can we playback iTunes DRM movie on Windows 8.1/8 RT/Pro Tablets & Phones?

Software required:

I would like to recommend this iTunes to Windows 8.1/8 Converter (Mac users: Mac iTunes to Windows 8.1/8 Converter), a professional DRM removal tool to help you roll off DRM protection from iTunes Store movie, and convert them to H.264 MP4 as best format for Windows Tablets & Phones, so that you can watch iTunes purchased videos on these Windows 8.1/8 devices.

Note: Get more discounts in Money saving bundles:

Tutorials: How to transfer iTunes DRM video to Windows 8.1/8 Tablets & Phones? 

Step 1. Install DRM video to Windows 8.1/8 Converter.

Tips: There would be a command window pop up during the installation, pls do not shut down it and let it running until the installation completed.


IMPORTANT:

Note that you shall not launch iTunes until reaching the last step – clicking the “Convert” icon.

Step 2. Add video and choose target format.

Drag and drop your videos to it directly, or you can click icon to import them as below.


Click the drop-down list besides “Format” list, you can find many presets and columns for different devices and programs. There are optimized video format for Surface RT/Pro, Dell Venue Pro and Windows 8 Phone from Windows column, and basically the Common Video -> H.264 Video (*.mp4) is an universal format for Windows 8.1/8 RT/Pro Tablets & Phones.


Step 3. Adjust specs (Optional).

If you want to customize output video size, bitrate, frame rate and others, just click “Settings” to enter profiles settings window.

Step 4. Start conversion.

Now click the big red icon to start converting iTunes M4V videos to Windows 8.1/8 RT/Pro Tablets & Phones; this converter will activate your iTunes automatically and start to play this video. The player windows cannot be removed or closed.

In the meanwhile, it will start to record this video in MP4 real-time. The conversion time is equal to the video length itself; you can do other tasks during the converting the process.

Note: The system volume could turn off temporally during this period; no worries, do not touch it to get perfect DRM removed video.

After the conversion, hit “Open” to quick locate converted videos.

Tips:

1. The DRM removing process may mislead your anti-virus software to falsely report virus/worm. Please ignore the report to keep on ripping.

2. This product cannot convert unplayable video (damaged, unauthorized, etc).

What's more, you can also play your Blu-ray, DVD and AVI video on your Windows devices.

Start and find Surface Apps for Trips

Here are recommended apps for trips with your Surface tablet.


If you’re planning a trip and you’re going to take your Surface, I have some recommendations for which travel apps you should take. I picked these apps for their entertainment and utility value, whether you are on a trip for business or pleasure.

All of these apps will work on either a Surface RT/2 or Surface Pro/Pro2.

 Skype: If you don’t want to blow your cell minutes checking in with the kids, you can always use Skype to connect anywhere you can get a network connection to any other computer in the world. Best thing is it’s free. And if you bought a Surface 2 tablet, you can turn to free Skype.


   Netflix, HuluPlus, Crackle: So long as you have WiFi in your hotel room or at the airport, it might be nice to watch some TV/Movies. If you have a Netflix/Hulu+ subscription, these apps are invaluable. Be aware, though, if you’re outside of the US/Canada, you may not be able to connect due to country restrictions. However, you can use a DNS Proxy (http://www.smartdnsproxy.com/, for example) to bypass those restrictions and stream your movies. There is a cost but it’s usually very inexpensive (around $5 USD/month.)

 Kindle: There’s few things better than reading a good book to relax. With Kindle, you can take a whole collection of books with you while avoiding the outrageous overweight baggage fee.

  Boingo: This app will help you find WiFi hot-spots. It’s not perfect and works best in the US/Canada, Europe and, Japan/China but if you don’t know the area you’re in, it might help. I’m hoping it will work in Panama.

 Flight Locator: This app will help you track your flights during the layovers or if you’re getting ready to head to the airport. In addition, you’ll need to know the flight numbers for the planes you want to track but it’s free and very handy at airports.

 Network Speed Test: This handy little app will test the speed of the WiFi you’re connecting to. This can save you a lot of frustration if you know your hotel connection isn’t quite fast enough to let you stream Netflix movies up front instead of having it stop to buffer every 12 seconds during a good scene.


Hopefully, you found this list handy. I know this isn’t a super advanced topic and that you probably already had some of these apps installed but, maybe, I gave you an idea or two on how to make your next trip a little easier or more fun.

Oh yeah, one very important non-app item. Before you head out on your trip….. MAKE SURE YOU HAVE YOUR CHARGER. Unlike the iPad/iPhone chargers, there aren’t a million knock-offs that you can buy at any corner gas station (at least not yet).

If you have any apps you think I missed, please let me know.

How to get DVD/CD disc to Surface Pro for playback

Ever tried to play DVDs or CD discs on a Surface Pro? Obviously, you need attached hardware or turn to some software for help. This article will provide two method for you to get DVD/CD playback on your Surface Pro.

Since the Windows 8 and 8.1 released, Microsoft has made its decision to remove the ability of playing DVD and CD discs. Without the function built into it, you have to ask for the third party software and additional hardware to accomplish it. 

Obviously, the Surface Pro does not have the specific hardware needed to insert DVDs or CD discs, and this is reportedly one of the reasons why Microsoft didn’t include software to play physical media discs in Windows 8.

Below I will show you the way to enjoy DVD/CD on Surface Pro with Win 8.1 Pro OS.

The Hardware

The Surface Pro only has a single USB port. So, if you want to utilize more than one USB device you’ll need a good USB hub. Here we choose the Satechi 4-port USB 3.0 hub. The Satechi includes enough port access to provide multiple options for additional devices attached to the Surface Pro. With it, you can easily plug the external USE DVD/CD drives, mouse, etc. as you like.


For DVD/CD playback, you also need a good external DVD drive. Portable USB ones are recommended due to their easy to transport. The 6X read speed is necessary for DVD playback and the higher the better. You can choose from amazon.com like LG, Samsung, Pioneer, etc. You can also do your own research on the proper DVD/CD device to fit your lifestyle, or you can take my word for it and grab it from Amazon.com. Below is an example for you.

Surface tablets are really convenient and you can download or install 99% of what you need right from the network. However there are times where you might need to access data or install software from DVD/CD to your Surface tablet.


The most obvious way to do this is with a Portable DVD/RW External Drive. You can just plug it into the handy USB port and as long as it’s on the supported hardware list, you will see it pop up in Explorer on the desktop as a drive. This will work for Surface RT/2 or Surface Pro/Pro2 tablets just like from any other Windows computer. Though, you will only be able to actually install software if you have a Surface Pro/Pro2.

On Surface RT/2, you can not install software without going through the Windows Store.

What if you don’t have a Portable DVD/RW External Drive? No problem, we have a method to get the data to your Surface tablet without a USB DVD/CD drive.

This method does require access to a computer with a DVD/CD drive (I’m good but not so good I can teach you how to magic the data off of the disc without a drive). I’m assuming that it will be a Windows machine but even if it’s not, the ideas will carry over, although the steps will be different.Access data or install from DVD/CD to Surface

This method involves using software on a desktop or laptop with a DVD/CD drive to create an ISO file. An ISO file is essentially a copy of a whole CD or DVD without the disc. Your Surface can then mount the ISO file as if it were reading a real disc.

On a Surface RT/2 this means you can read files or play MP3s and on a Surface Pro/Pro2 you can also install programs. I’ve been using this technique to install some of my old games on my Surface Pro 2 (Evil Genius, for example) that I can’t get on Steam.

To do this, you will need to download some ISO creation software. I’m using ISO Toolkit from www.AskVG.com in this post for a few reasons…
  • It’s free.
  • It’s pretty simple to use.
  • It’s portable (doesn’t need to be installed on a machine, just run the .exe)
  • It doesn’t try to trick you into installing extras like toolbars.

OK, let’s get started…

Create an ISO File

From the desktop/laptop computer with a DVD/CD drive, download ISO Toolkit.
Open the zipfile and copy the ISOToolkit.exe file to the desktop.
Make sure the DVD/CD you want to copy is in the drive.
Run it. You may get some security alerts as the program needs to access the DVD/CD drive.


  • Select the Copy Image tab.
  • Make sure the DVD/CD drive is selected.
  • Tap or click the Select button to pick the location where the ISO file will be created as well as it’s name.
  • Tap or click the Copy Image button to start the ISO creation process.
  • Wait until the copy is complete. It can take a while (especially for a DVD) so be patient.

That’s it. You’ve created your ISO file. Now you can get the file to your Surface tablet with SkyDrive or a USB stick, then do the procedure below to access it. Be aware that you can’t use SkyDrive to transfer the ISO file if it’s over 2GB in size.

For the next part, I’m going to assume you used a USB stick to copy the file over to your Surface.

Mount an ISO on your Surface

  • Go to desktop mode.
  • Plug in the USB key with the ISO file on it.
  • From Explorer, browse to and then tap and hold on the ISO file (right click).
  • When the right-click menu appears, tap Mount.


Your Surface will mount the ISO file as if it were a DVD/CD in a drive. In fact, if you look at the screen shot below, you’ll see it even labels it “DVD Drive”


That’s pretty much it, at this point, you can treat it as if it were a real DVD/CD drive. When you’re ready to eject the ISO, just tap and hold on the drive in explorer and you’ll get a menu like the one to the right. Just tap on Eject and the drive will vanish.


I hope you found this post helpful.

I know it’s kind of an esoteric thing but, I had someone ask me how to get data from old discs to be accessible from their Surface and I thought others might appreciate it as well. Oh, and in case you’re wondering if I was able to get Evil Genius to work this way…


The Software
The last piece of getting your Surface Pro to actually play DVD/CD discs is to install software that will actually perform the function that Microsoft left out of Windows 8.1. In this case, there's only one thing you need - a DVD to Surface Pro Ripper to remove disc encryption, to transcode DVD to Surface Pro friendly format. Pavtube DVD Ripper is just such kind of easy-to-use program to help you do the conversion in a few clicks.

Why we choose Pavtube DVD Ripper? Pavtube DVD Ripper is a professional Blu-ray/DVD ripping, converting and backing up tool that works on Windows. it can rip and convert latest DVD movies to iPad Air supported MP4/M4V/MOV and other popular video formats like AVI, WMV, MKV, FLV, SWF, 3GP, etc. for playback anywhere. Also, it comes with a built-in editor that allow you to edit your Blu-ray movies by trimming, cropping, adjusting video effects, adding srt/ass/ssa subtitles etc. What’s more, its high conversion speed and easy-to-use features have won much Windows users praise. (See Top 5 DVD Ripper Reviews)

Good news: just found it’s on 30% OFF Summer Holiday promotion sales; don’t miss it!

No need to set the specs manually, no need to figure out which bitrate/framerate/resolution is best for Surface Pro. DVD to Surface Pro Converter integrates the best presets for Surface Pro for you. All you need to do is:

  • Import
  • Choose preset
  • Click and go! It’s just as simple as that.

Tips:


Here is a tutorial to rip & convert Blu-ray to Surface Pro 2, just take it as reference.

Related Articles:

Microsoft Surface Videos and Movies Playback Tips
Transfer MKV, AVI, VOB, Tivo, WMV, MPG, MTS, FLV/F4V videos to Surface 2
MKV to Surface- Play MKV files on Surface Pro 3 
Enjoy Blu-ray to Surface 2 for watching 
Convert/Rip and Play Blu-ray movies on Surface Pro 3